
Pro Plug Installation Guide
Smart Bit Pro Plug System Installation Guide
3 Easy Steps
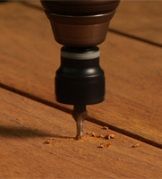
- Insert our Smart Bit Pro Plug Tool into your drill.
- Drill where your want to install your screw and plug.
- Drill until you can not go any further, your bit has an automatic stop on it.
- Note: Make sure to use a sub-floor adhesive before installing your hardwood deck boards.
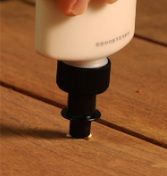
- Attach your special glue applicator to your glue bottle. You want to use a glue made for exterior applications.
- Squeeze glue into your pre-drilled hole.
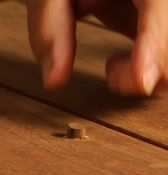
- Insert your hardwood plug into the pre-drilled hole.
- If you cannot push plug in, use a rubber mallet to lightly pound your plug in.
- Wipe away any excess glue before it dries.
- Note: Plug should be flush but you can use an 80 grit sandpaper to sand your plug if necessary.